Tips and Tricks for Rhipsalis Burchellii Propagation

A Rhipsalis Burchellii is quite easy to propagate. In fact, it was one of the first plants I ever successfully propagated many years ago. My current plant was grown from a single stem. They grow quite vigorously and my Rhipsalis has been given countless haircuts. This time I decided to document the process for those of you interested in Rhipsalis Burchellii propagation.
Rhipsalis Burchellii Care
First, let's talk about Rhipsalis. Rhipsalis is a genus in the cactus family. There are many varieties with widely different stem patterns. Some varieties have wide flat stems and others thin stick-like stems. Rhipsalis Burchellii has thin stick-like stems that grow in segments. It is sometimes called a Mistletoe Cactus.
I have found the Rhipsalis Burchellii to be extremely easy to care for. It's only high maintenance in the fact that it needs to be trimmed about every six months because of how vigorously it grows. Rhipsalis Burchelli do well in bright indirect light like from an east or west-facing windows. Water your Rhipsalis when the top two inches of soil are dry. The great thing about Rhipsalis Burchellii is you can visibly see in the stems when it needs water, they get a little shriveled and floppy.
How to Take Rhipsalis Burchellii Cuttings
As I mentioned above, I have had to trim my Rhipsalis Burchellii many times over the years. A lot of times I haven't even bothered to propagate the cuttings despite how easy it is because of space. However, I built a greenhouse this past spring, so now I have room again for more Rhipsalis!

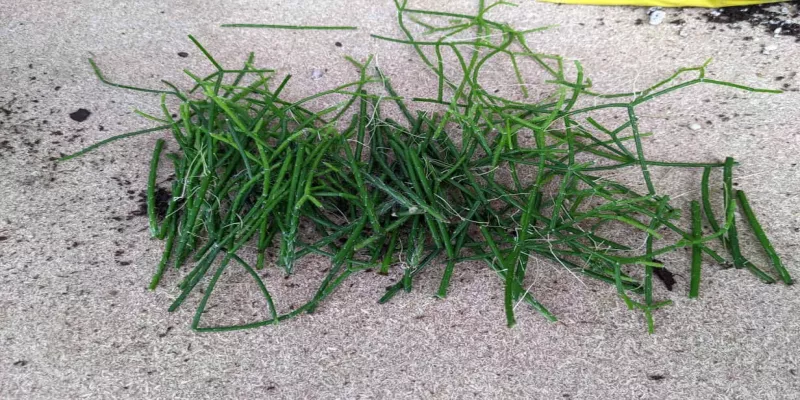
Believe it or not, the picture above is shot taken after taking the cuttings! Trimming to a certain shape is very subjective. Whatever fits your aesthetic. Personally, I like to let mine grow pretty wild. There's not much to trimming. Make sure you have a sharp set of scissors and make sure they are sterilized. Some plants are picky about where you trim, but not the Rhipsalis Burchellii. You can cut it close to a segment or in the middle of a stem. Typically new growth will sprout under the cut out of the side of the stem. Just go for the look you want, this plant is very forgiving.
If you are reading this you're probably cutting for the purpose of propagation so here are a few more tips. Some of the stems you trim may be reeeaaallly long. You can cut those into several stems. I like to keep mine around three, maybe four, inches long. Here's the thing though, you have to be really careful to make sure you remember which side is up and which side is down because it matters for propagation. If you plant one upside down, it won't root.
Rhipsalis Burchellii Propagation
Stick it in soil. End of blog. Just kidding, but it is kind of that easy. In fact, a lot of time I just stick the trimmed stems into the same pot as the plant I just cut them from and I have had a very high success rate with just that.

Pictured above are the cuttings I took from my Rhipsalis Burchellii. A nice little pile. I let mine go crazy wild so this haircut was overdue. Here they have been pre-cut into the three-inch cuttings that I mentioned earlier. I will dip them in my favorite rooting hormone and stick them in some soil.
Rhipsalis Burchellii Soil Mix
Again, nothing special. The main thing you want is something with good drainage. While propagating you don't want the soil to stay wet because at first there are no roots to absorb the water and wetness can rot the unrooted cuttings. I used some regular potting soil I had on hand and mixed in more perlite (about 3:1 soil to perlite) to add some extra drainage. If you already have something like cactus soil mix, that will work as well.
Rhipsalis Burchellii Cutting Care
After you have dipped your cuttings in the rooting hormone, you just stick them in your soil mix. Another consideration is your pot. Make sure that your pot has drainage holes. It doesn't matter what your soil mix is if you don't have drainage, it will be too wet. I used an old nursery pot I already had. When rooting any cutting I usually like to have the soil line about two inches from the top of the pot if I can manage. That way I can use the sides of the pot to help hold up the cuttings.

Keep the potting soil mix damp. You don't want to make it too wet. Often with cuttings, I like to water using a spray bottle rather than a watering can. It's easier to make the soil lightly moist rather than soggy. or unevenly wet. You may need to do this frequently, like every day or two, so your soil isn't too moist or dry. Keep the cuttings in indirect light, nothing too bright. Sun can stress the cutting and also dry out your soil more quickly. In a few weeks or less, you will start to see roots! Once there are a good amount of roots from most of the cuttings you should start watering it normally, rather than using a spray bottle.
Add new comment